How to Set an Auto-Reply Message for Your Email Account
How to Set an Auto-Reply Message to Your Email Account
Overview
When you are on vacation or away for a few days, you can create an auto-responder message for your email accounts. This feature ensures that anyone who sends you an email receives a confirmation that their message has been received. The auto-reply function can also be used for various other purposes.
Creating an Auto-Responder Message
1. When Creating a New Mailbox
When you create a new mailbox, there is an "Auto-Reply" checkbox. Select this option to enter your auto-reply message.
2. For Existing Email Accounts
To set up an auto-reply message for an existing email account:
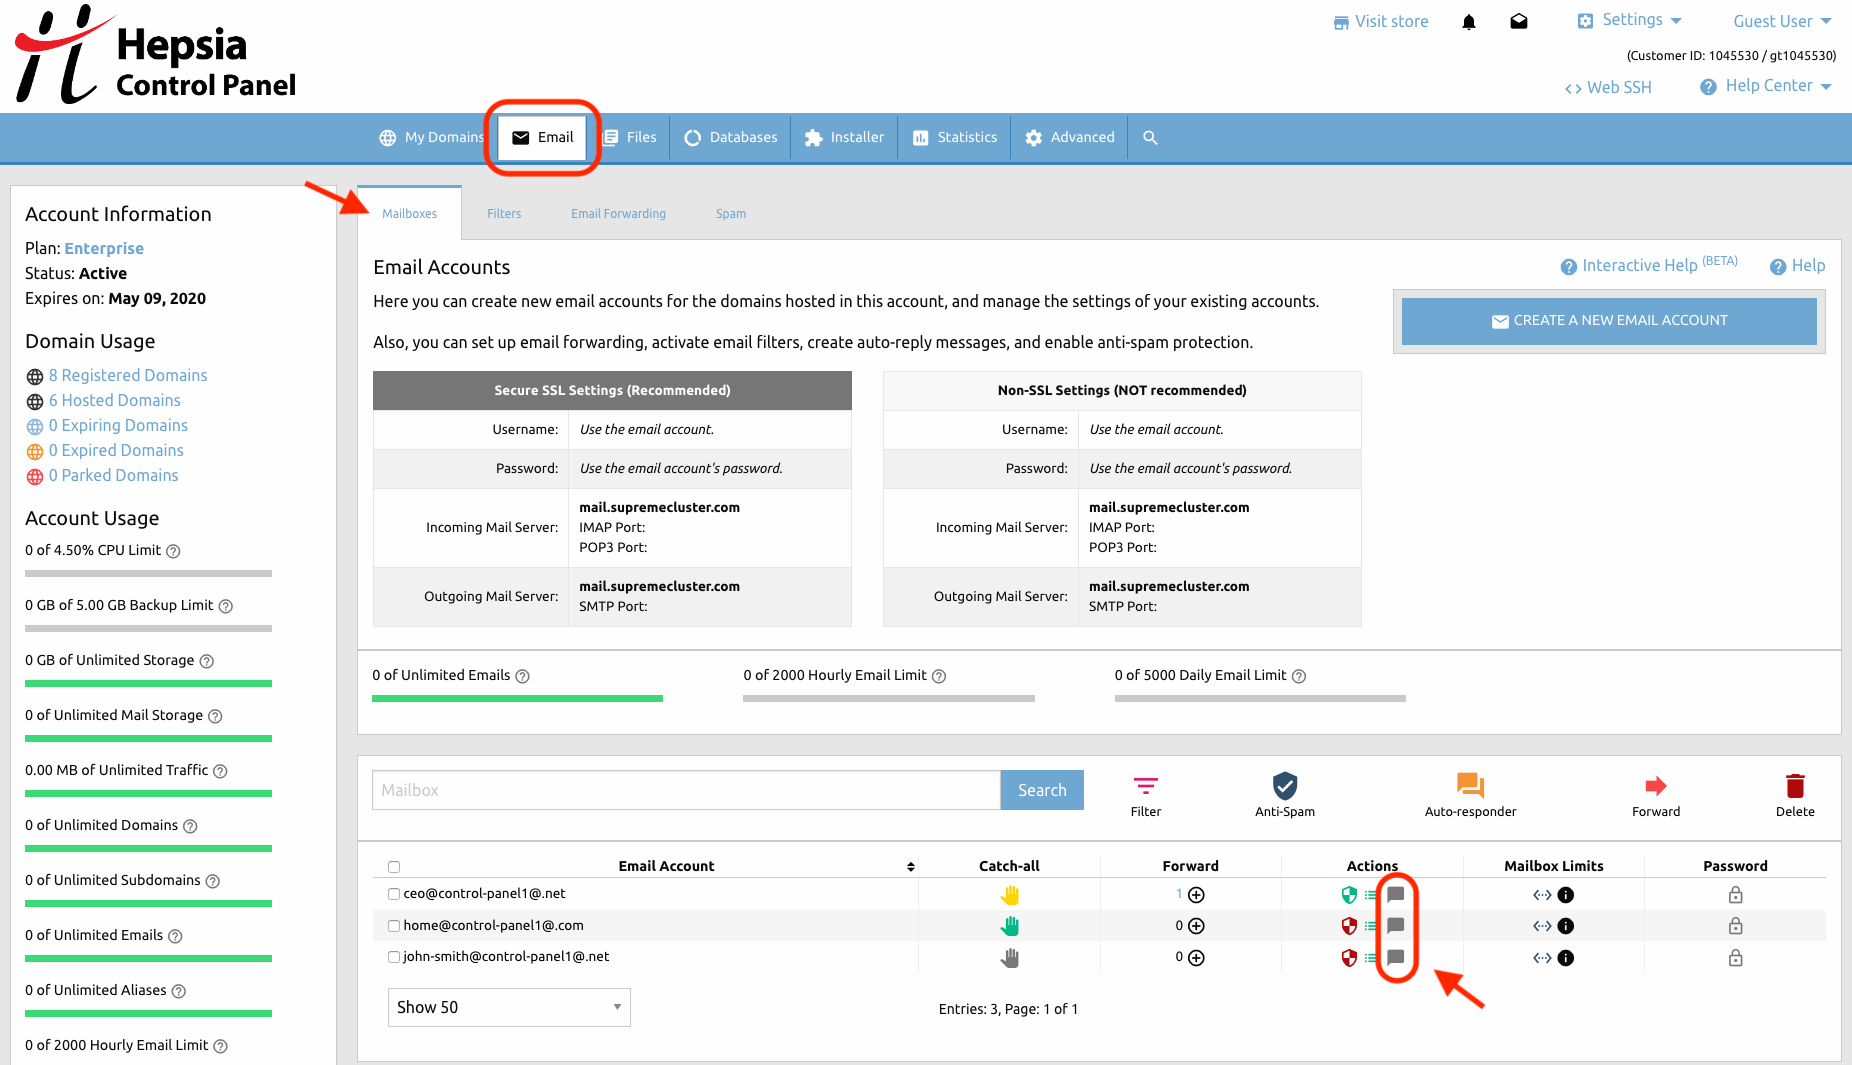
- Go to the Email -> Mailboxes section of your Control Panel.
- Locate the list of all your email accounts.
- On the far right, in the Actions column, click on the grey chat icon (⚪) if no autoresponder is set.
- In the next window, check the Enabled box and type your autoresponder message.
- Click Set-up an auto-reply message to apply the changes.
3. Changing Your Auto-Reply Message
If you want to change the auto-reply message:
- Find the mailbox and click on the yellow autoresponder icon (🟡), indicating a setup for that mailbox.
- Make your changes and save.
Note: To disable the auto-responder, uncheck the activation checkbox.
4. Setting Auto-Reply for Multiple Email Accounts
To set the same autoresponder message for multiple email accounts:
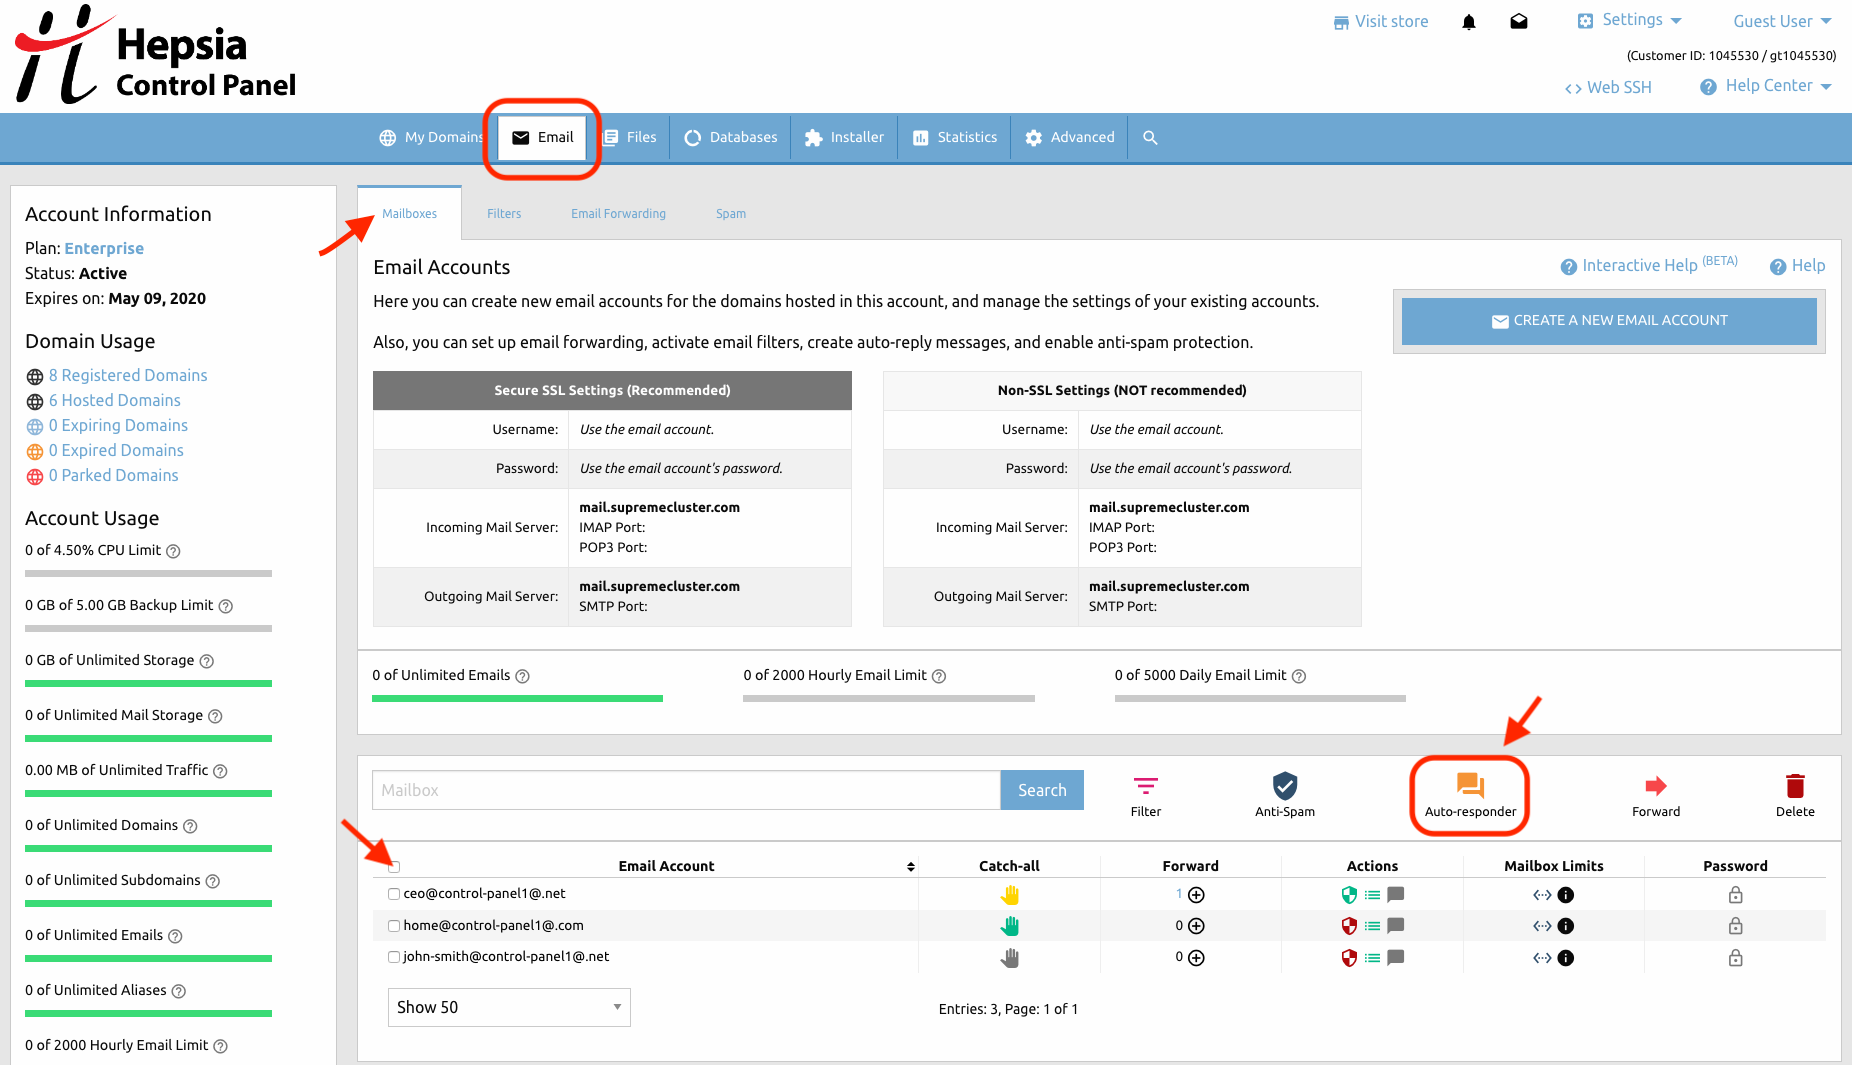
- Select the checkboxes next to each email account in the Email Accounts column.
- Click on the Auto-responder button in the top Action sidebar.
- Enter your message on the next page and press Set-up an auto-reply message.
Supporting Images


Tags: auto-reply, autoresponder, email, email accounts, email management, email settings, vacation message
